In This Guide
- Going Beyond the Expected
- Double Exposure Photography
- Silhouettes and Backlighting
- Reflections and Creative Framing
- Artistic Detail Shots
- Motion and Long Exposure
- Playing With Light
- How to Plan for Creative Shots
- Frequently Asked Questions
Going Beyond the Expected
Every couple wants wedding photos that feel uniquely theirs. Not just beautiful — but different. Photos that make people stop scrolling and say “How did they do that?” The good news is that creative wedding photography does not require exotic locations or expensive props. It requires vision, technique, and a willingness to try something unexpected.
I want to be clear about something upfront. Creative photography should enhance your wedding coverage, not replace it. The traditional shots — the first kiss, the vow exchange, the family portraits — those are non-negotiable. They are the foundation of your wedding story. However, layered on top of those essential moments, creative techniques add art, emotion, and a sense of wonder that elevates the entire gallery.
According to WeddingWire Canada’s 2025 trends report, 78% of couples now request at least some creative or artistic photos in addition to traditional coverage. Moreover, creative images are the ones that get framed, printed on canvas, and shared most on social media. They become the signature images of your wedding story.
| Stat | Figure | Source |
|---|---|---|
| Couples Requesting Creative Photography | 78% | WeddingWire Canada, 2025 |
| Creative Shots Chosen for Canvas Prints | 3x More | Professional Photographers of Canada, 2024 |
Double Exposure Photography
Double exposure is one of my favourite creative techniques, and it consistently produces the most emotionally impactful images in any wedding gallery. The concept is simple — two images layered into one. The execution, however, requires careful planning and a deep understanding of how the technique works.
In a wedding context, double exposure typically combines a portrait of the couple with a meaningful environment — the ceremony venue, a landscape, flowers, or architectural details. The result is an image that is both a portrait and a story. The couple’s silhouette filled with the forest where they said their vows. A bride’s profile merged with her bouquet flowers. A groom’s outline containing the church interior.
I create double exposures both in-camera and in post-production. In-camera double exposures have a beautiful, organic quality — the way the two images blend is slightly unpredictable, which gives each result a unique character. Post-production double exposures offer more control over the blend, opacity, and positioning. Both approaches have their place, and I often create several versions to give couples options.
The key to a successful double exposure is contrast. The portrait should have clear, strong shapes — usually a silhouette or side profile. The second image should have detail and texture that fills those shapes in an interesting way. For example, a dark silhouette filled with bright autumn leaves creates a stunning contrast. However, two similarly bright or similarly dark images tend to wash out when combined.
Photographer Tip
For the best double exposure results, take a clean side profile during your portrait session. Stand against a bright, simple background — open sky is ideal. This creates the strong silhouette that becomes the “canvas” for the second image. I will guide you through the pose. It takes about 30 seconds and the results are worth it.
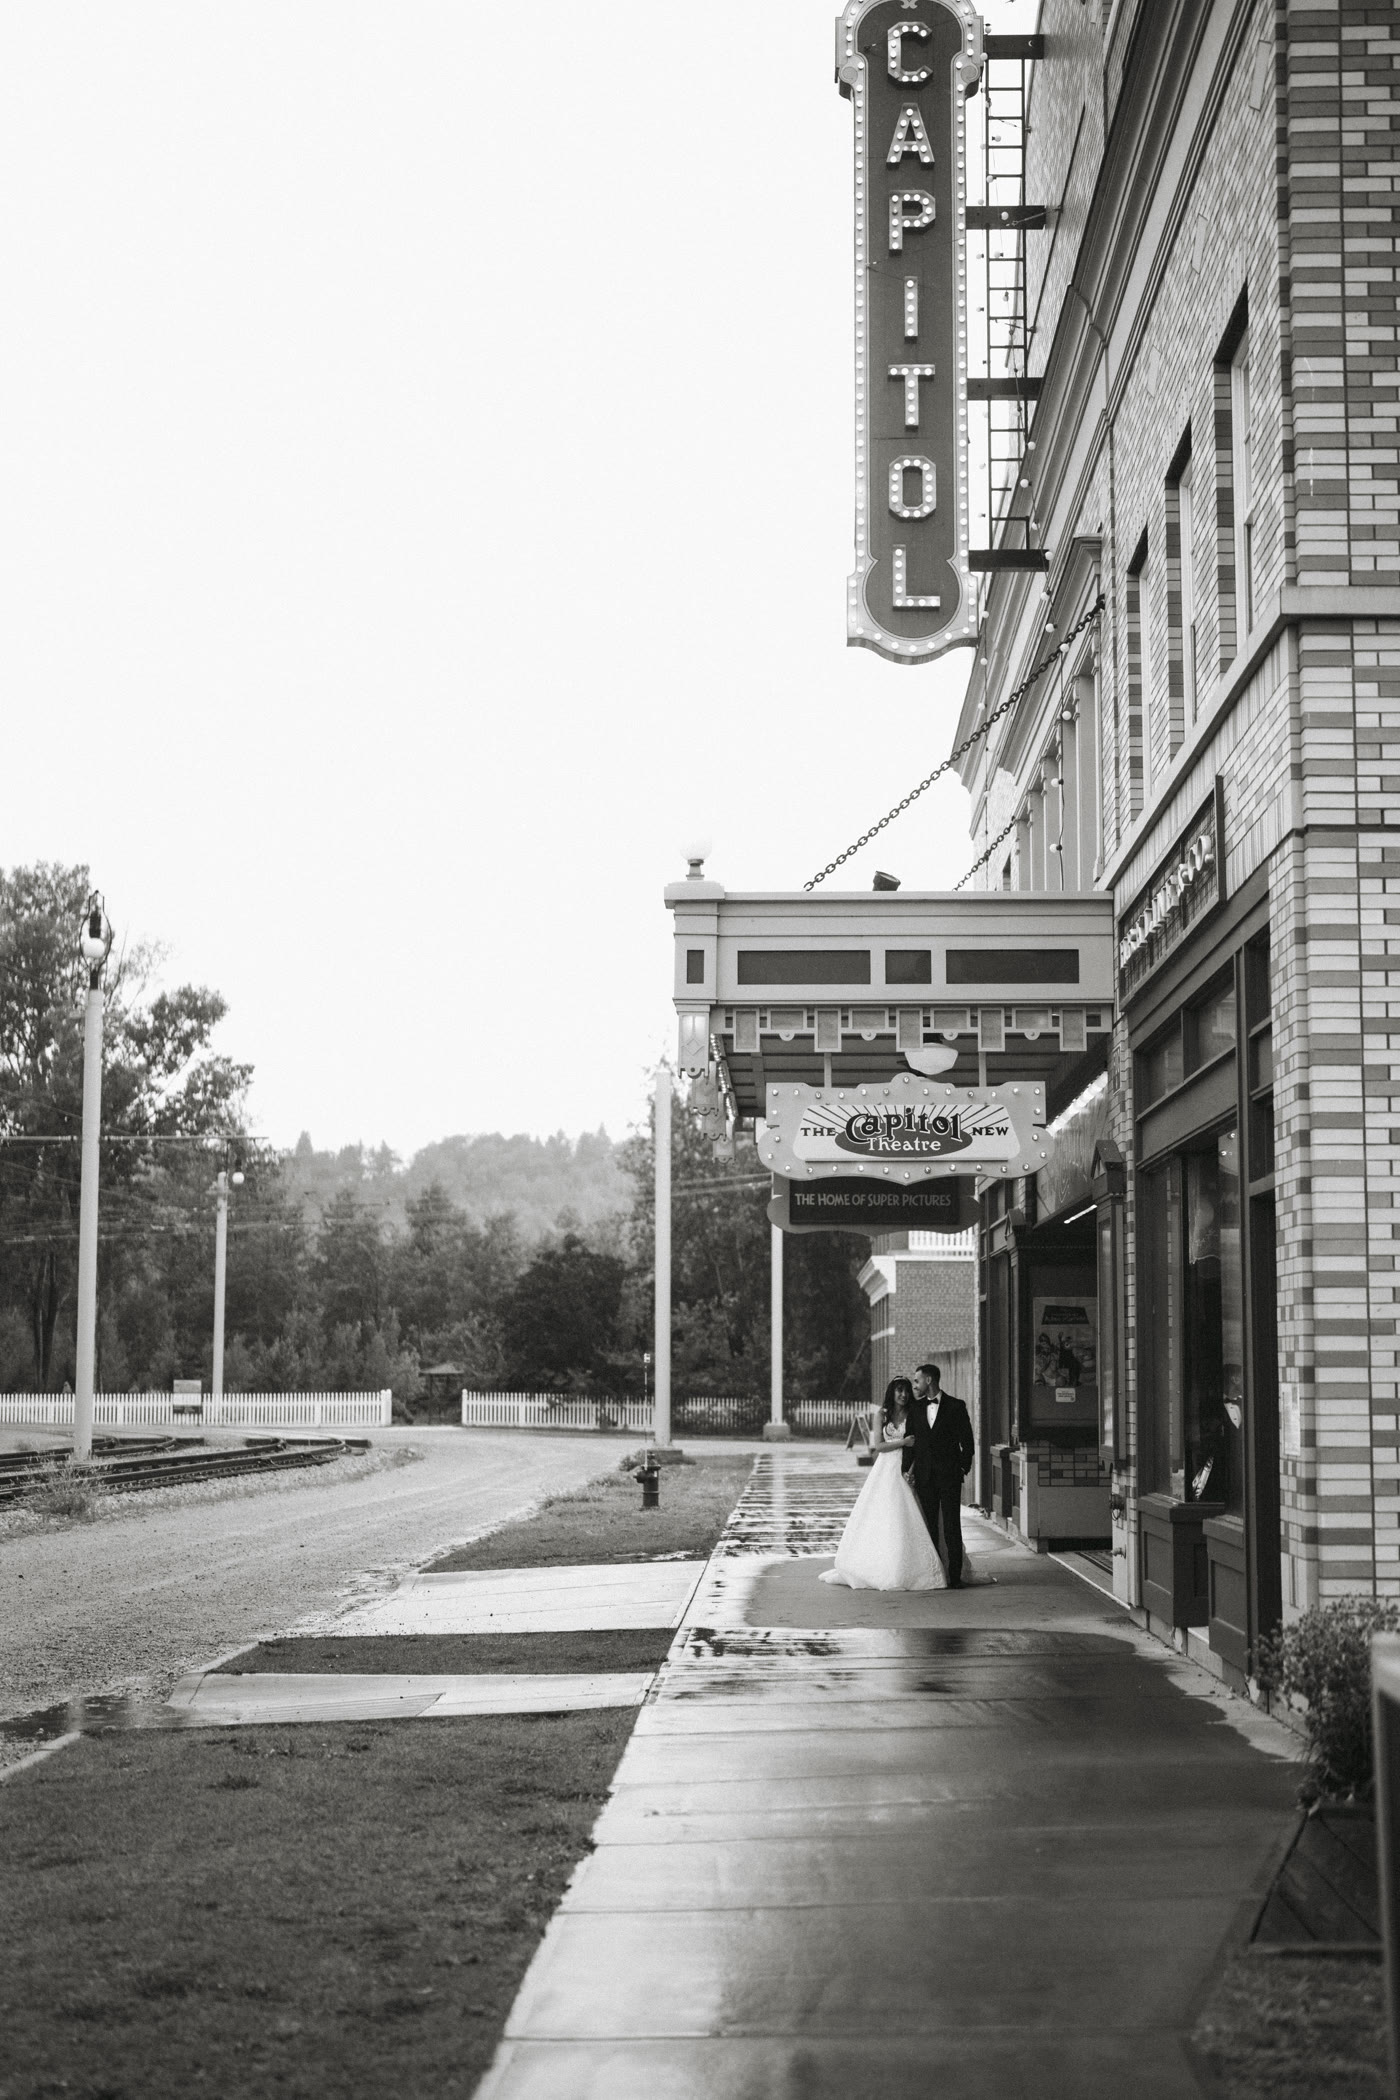
Silhouettes and Backlighting
Silhouettes strip away every detail except shape. There is no dress detail, no facial expression, no colour — just the pure outline of two people in love. And somehow, that simplicity makes the images incredibly powerful. In fact, silhouette images are consistently among the top-shared wedding photos on social media because they are universally emotional.
Creating a wedding silhouette requires backlighting — positioning a strong light source behind the couple. The most natural and beautiful backlight is the setting sun. During golden hour, I position the couple directly between my camera and the sun, expose for the bright sky behind them, and let their figures fall into pure black silhouette.
Edmonton’s summer golden hour is ideal for this technique. Locations like Hawrelak Park and the river valley offer wide-open western horizons perfect for backlighting. The sun sits low on the horizon for an extended period, giving us a wide window to capture multiple silhouette compositions. I look for opportunities that add story to the silhouette — the couple under a tree, in a doorway, against a venue’s architecture, or with their veil caught in the wind.
Silhouettes also work beautifully during Indian wedding celebrations. A bride in a flowing lehenga creates an extraordinary silhouette shape. The ornate jewelry, the dupatta, the detailed embroidery — all of these elements create complex, beautiful outlines that are instantly recognizable even without detail.
Beyond sunset silhouettes, I also create indoor silhouettes using window light, doorway frames, and backlighting from venue uplights. A bride standing in a window during the getting-ready phase, backlit by morning light — that silhouette tells a story of anticipation and beauty. Moreover, these indoor silhouettes work on overcast days when outdoor golden hour might be muted.
Reflections and Creative Framing
Reflections add a dreamlike quality to wedding photography. They introduce symmetry, depth, and a sense of visual poetry that straight-on compositions cannot achieve. And the best part? Reflective surfaces are everywhere — you just need to know where to look.
Water reflections. Even a small puddle can become a creative tool. After rain, I look for puddles on pathways, parking lots, or flat stone surfaces. Shooting from a low angle, the couple’s reflection in the water creates a mirror image that doubles the impact of the portrait. Edmonton’s river valley and urban areas provide plenty of these opportunities, especially in spring.
Glass and mirror reflections. Venue windows, glass doors, mirrored walls, and even car windows all create reflection opportunities. One of my favourite techniques is photographing through a glass door — the couple on one side, a faint reflection of the venue or landscape overlaying the image. The result is layered and complex without being busy.
Ring reflections. Placing the wedding bands on a reflective surface — a polished table, a glass, or even a phone screen — creates stunning detail shots with perfect symmetry. The reflection adds dimension and elegance to what could otherwise be a simple flat-lay photo.
Prism and crystal effects. I carry small prisms and crystal glass pieces that, when held near the lens, create rainbow light leaks, double images, and ethereal blur effects. These are subtle enough to add magic without overwhelming the image. As a result, the photos feel artistic and unique without looking over-processed. On the other hand, I use these sparingly — a few prism shots per wedding keeps them special.
Creative photography is not about tricks — it is about seeing the world differently. A puddle becomes a mirror. A window becomes a frame. A prism becomes a paintbrush. The techniques are simple. The vision is what matters.
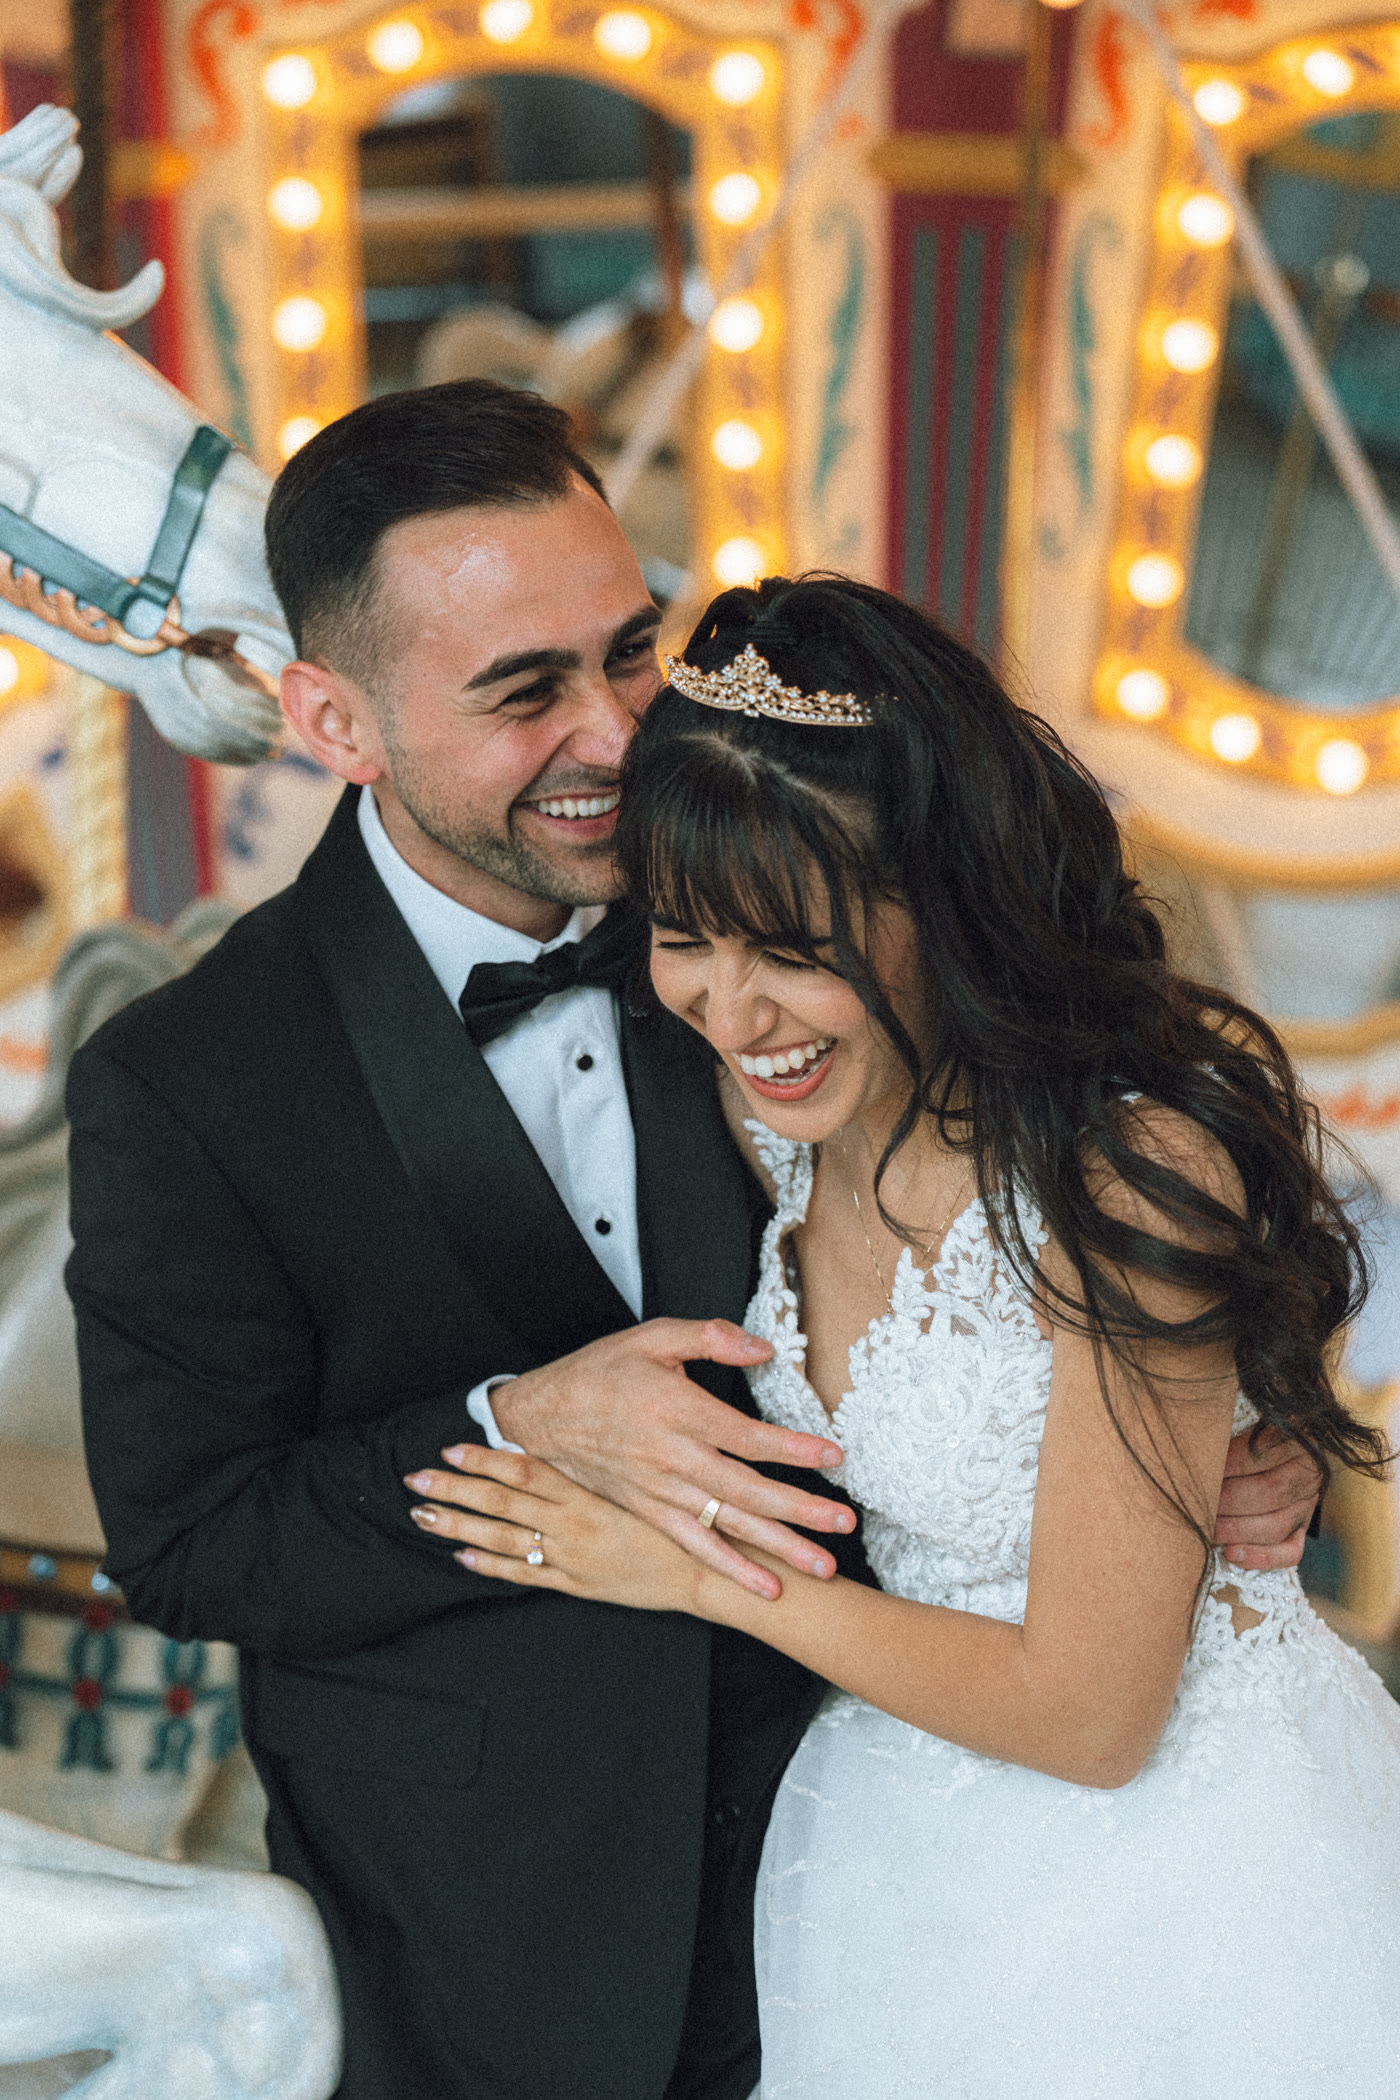
Artistic Detail Shots
Detail shots often get overlooked in wedding photography discussions. However, they are the images that capture the craftsmanship, planning, and personal choices that make each wedding unique. The dress beading. The invitation calligraphy. The custom cufflinks. The mehndi patterns. These details deserve artistic treatment, not just documentation.
Environmental context. Instead of photographing the rings on a white background, I place them in context — on a flower petal, beside the invitation suite, on a textured fabric swatch that matches the wedding palette. The detail becomes part of a larger visual story rather than an isolated product shot.
Macro storytelling. With a macro lens, the texture of a silk sari becomes an abstract landscape. The crystal beading on a bridal gown becomes a galaxy. The henna on a bride’s hands becomes architectural art. These extreme close-ups reveal beauty that the naked eye misses. They add variety and visual interest to the gallery. In addition, they honour the artisans and craftspeople whose work made the wedding beautiful.
Flat-lay compositions. Gathering wedding details — invitation, rings, perfume, earrings, shoes, vow booklet — and arranging them in an artful flat-lay composition creates a single image that encapsulates the entire wedding aesthetic. I spend 10 to 15 minutes during the getting-ready phase creating these compositions. The resulting images are perfect for the first page of a wedding album.
Motion and Long Exposure
Wedding photography does not have to freeze every moment. Sometimes, allowing motion blur adds energy, emotion, and a painterly quality that sharp images cannot replicate.
Veil toss. A slow shutter speed combined with a gentle veil toss creates flowing, ethereal fabric movement while the bride’s face remains sharp (using rear-curtain flash). The result is an image that feels alive and dynamic. It captures the feeling of the moment, not just the appearance.
First dance blur. During the first dance, I take a few frames at a slow shutter speed — 1/15th to 1/4th of a second — while panning with the couple. The background streaks into blur while the couple remains relatively sharp in the centre. These images capture the spinning, romantic movement of the dance in a way that frozen frames cannot.
Sparkler exits. Sparkler send-offs are a classic creative opportunity. The slow shutter captures the light trails while flash freezes the couple. The result is magical — bright, swirling light around a sharp, joyful couple running through a tunnel of sparklers. Moreover, sparkler exits work beautifully as the closing image of a wedding gallery.
Light painting. After dark, I sometimes use a small LED light to “paint” around the couple during a long exposure. The camera sits on a tripod, the shutter stays open for several seconds, and I move the light around the couple’s silhouette. The result is a glowing outline that looks like something from a film. This technique requires darkness, patience, and a couple willing to stand still for a few seconds — but the payoff is extraordinary.
Photographer Tip
If you want a sparkler exit, buy the long-burn sparklers (36-inch, 3-minute burn time). Short sparklers burn out in seconds, which does not give enough time for photos. In addition, have someone light them in sequence down the line just before you walk through — not all at once. Timing matters.
Playing With Light
Light is the fundamental element of photography — the word literally means “writing with light.” Creative use of light transforms ordinary scenes into extraordinary images. Here are techniques I use to push beyond standard lighting.
Harsh light and shadows. Most photographers avoid harsh midday sun. I sometimes embrace it. Strong directional light creates dramatic shadows — window blind patterns across a bride’s face, geometric shadows from architectural elements, tree branch shadows on a white dress. These images are bold, graphic, and editorial in feel.
Backlit haze. Shooting towards the light through haze, mist, or fog creates an otherworldly atmosphere. Edmonton mornings, especially near the river valley, sometimes offer natural mist that backlights beautifully. If nature does not cooperate, a small haze machine can create the same effect for creative portrait sessions.
Window light portraits. The getting-ready phase offers some of the best natural window light of the entire day. Soft, directional light falling across the bride’s face as she puts on her earrings, reads a letter from her partner, or shares a quiet moment with her mother — these window-lit images are classically beautiful and require zero additional lighting equipment.
Fairy light bokeh. String lights and fairy lights create beautiful bokeh (the soft, round, out-of-focus light circles) when shot with a wide aperture lens. Positioning the couple in front of a wall of fairy lights and shooting at f/1.4 transforms the lights into a sparkling, magical background. This works at receptions, engagement sessions, and even during sangeet celebrations where the venue is decorated with lights.
How to Plan for Creative Shots
Creative photography does not happen by accident. It requires planning, communication, and dedicated time in your wedding day timeline. Here is how to set yourself up for creative success.
- Communicate your wishlist: Tell your photographer which creative techniques excite you. Share Pinterest boards, Instagram saves, and examples from other weddings. The more I understand your taste, the better I can tailor my creative approach.
- Build in extra portrait time: Standard portrait sessions (30 minutes) are enough for traditional poses but tight for creative work. If creative photography is important to you, budget 45 to 60 minutes for couple portraits. The extra time allows us to try techniques without rushing.
- Schedule around golden hour: Silhouettes, backlighting, and lens flare techniques all depend on the setting sun. In Edmonton’s summer, this means planning portraits between 9:00 and 10:00 PM. Your timeline should accommodate this. Moreover, blue hour (20 minutes after sunset) offers its own creative opportunities with soft, moody light.
- Trust the process: Some creative techniques look strange in the moment. If I ask you to stand still while I wave a crystal near my lens, or if I lie on the ground to shoot through a puddle — trust me. The results will make sense when you see the final images.
- Weather as opportunity: Rain, fog, snow, and dramatic clouds create creative opportunities that sunny days cannot. If the weather is “bad” on your wedding day, your photographer should be excited, not worried. Some of the most dramatic and beautiful wedding images are born from imperfect weather.
Key Takeaways
- Creative techniques enhance traditional coverage — they do not replace it
- Double exposures, silhouettes, and reflections create signature gallery images
- Motion blur and long exposure add energy and dynamism to wedding photos
- Detail shots deserve artistic treatment, not just documentation
- Plan extra portrait time and schedule around golden hour for best results
- Share your creative wishlist with your photographer well before the wedding day
Want Creative, Artistic Wedding Photos? I bring both traditional coverage and creative artistry to every wedding I photograph. From double exposures to dramatic silhouettes — let us create images that are uniquely yours. Check out my portfolio and let us talk about your vision. Book a Free Consultation
Frequently Asked Questions
Do creative photos take away from traditional coverage? Not at all. I prioritize traditional coverage first — ceremony, portraits, family groups, reception highlights. Creative techniques are layered in during portrait sessions, transitions, and quiet moments. You will never miss an important traditional shot because I was chasing a creative idea. The creative work enhances your gallery without compromising the essentials.
Are double exposure photos extra? Double exposure and other creative techniques are included in my standard wedding packages. I incorporate creative work into every wedding because I believe every couple deserves art, not just documentation. The number and variety of creative images depends on the time available and the couple’s preferences.
Can you do creative shots during an Indian wedding? Absolutely. Indian weddings offer incredible creative opportunities — the rich colours of lehengas and sherwanis, intricate mehndi patterns, dramatic mandap architecture, and flowing dupattas all lend themselves to creative techniques. Double exposures with mehndi details, silhouettes of the couple under the mandap, and reflections in ceremonial items are some of my favourites.
What if it rains on our wedding day — can you still do creative shots? Rain is actually one of the best things that can happen for creative photography. Reflections in puddles, dramatic cloudy skies, romantic umbrella silhouettes, and the soft diffused light of overcast conditions all create stunning images. Some of my most awarded and shared wedding images were taken in the rain.
Do you also offer creative videography? Yes. My wedding videography incorporates creative techniques as well — drone footage, slow motion, time-lapse, and cinematic colour grading. Combining creative photography and videography in one package ensures a cohesive artistic vision across all your wedding media.
Explore my full photography portfolio or learn more about my approach.